 fxtadeusz@gmail.com
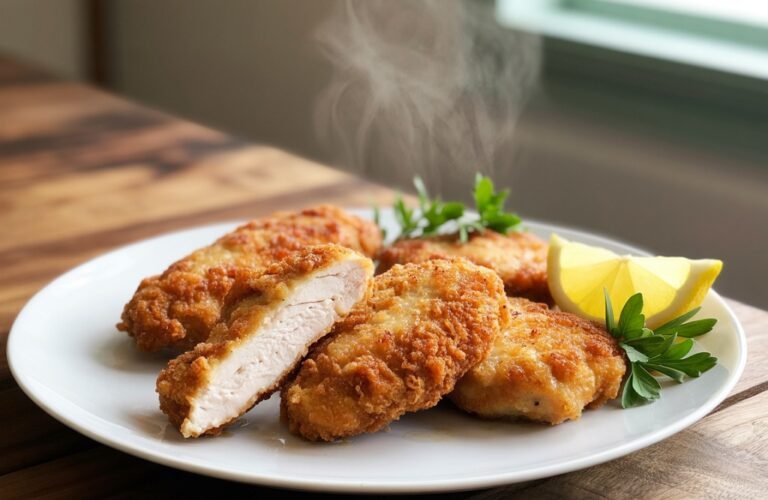
Discover the best chicken cutlet recipes – crispy, juicy, and full of flavor. Perfect for weeknight dinners, family meals, or crowd-pleasing comfort food.
You’ll never know how to make chicken cutlets perfectly until you’ve mastered that essential golden-brown crust. The sound of biting into a well-cooked chicken cutlet should be like the crunch of a buttery biscuit! Chicken cutlets, also known as chicken fillets and various breaded chicken recipes, have become a staple meal for families in America over time.
This breaded chicken recipe for chicken cutlet has worked for me every time. After you know how to do it, making chicken cutlets is quite simple, even for novice cooks. I’ll share with you what works, what doesn’t, and most significantly, how to make chicken cutlets that are consistently juicy and crispy!
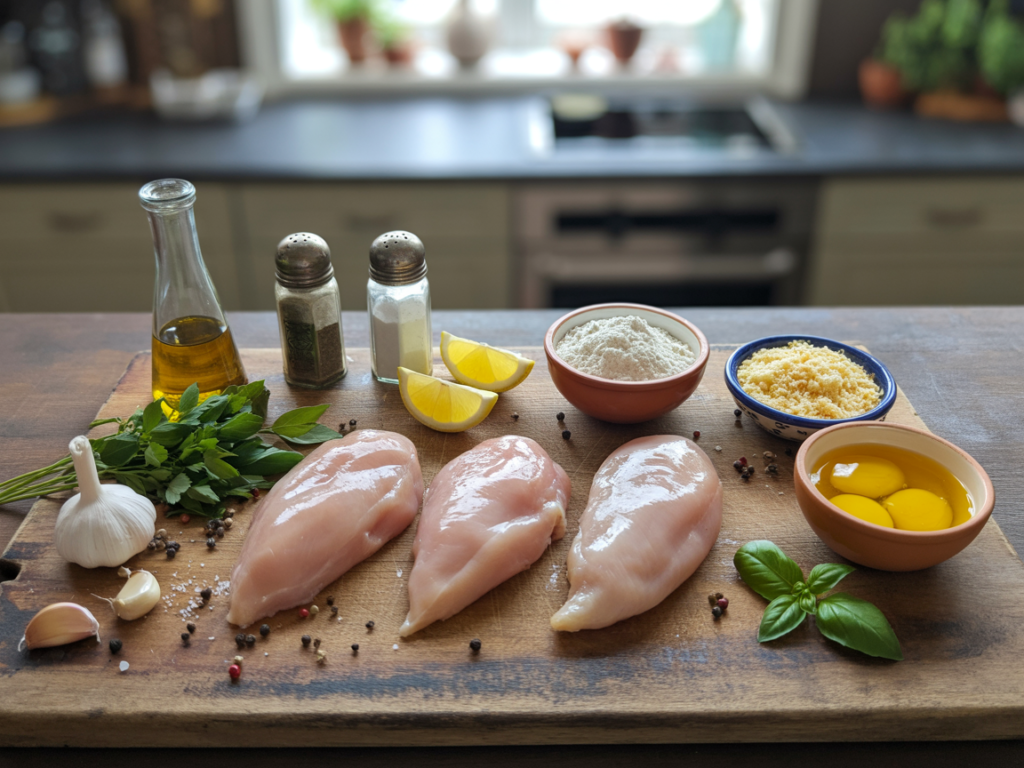
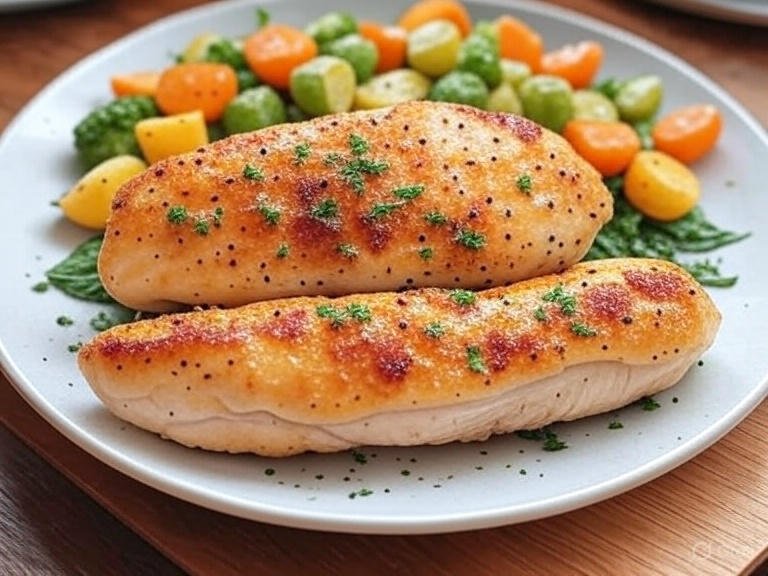
This beautiful ingredient photograph showcases everything you need to create perfect chicken cutlets. The raw chicken breasts take center stage, surrounded by the essential breading components arranged in artful bowls. Fresh herbs and citrus add pops of vibrant color against the warm wooden backdrop. This image immediately communicates freshness and quality, inviting readers to gather their ingredients and begin cooking with confidence.
Chicken Cutlets Recipe That Works Every Time
Crunchy, tasty, and crunchy chicken cutlets are not as difficult to make as you may think. Everyone has been on a fast and easy chicken cutlet dinner ideas train at some point. The moist, white chicken fillet on the inside is undoubtedly the most crucial part of a truly crispy cutlet. The outer layer of breading will be crisp and lightly browned. Chicken cutlet sandwich. You just have to know how to make chicken cutlet. This recipe for chicken cutlet will work out for you whether you are a novice cook or have made chicken cutlets for your family for years.
Making chicken cutlets might not appear to be the most exciting endeavor. However, the taste of that crunchy breaded crust quickly vanishes once the food hits your lips. In just 15 minutes, you may learn how to make chicken cutlets that turn out flawless every time! Perfectly crisp and golden crust with a juicy and flavorful inside are two of the things that set this chicken cutlet recipe apart.
Ingredients
- 4 boneless, skinless chicken breasts (about 1.5-2 lbs total)
- 1 cup all-purpose flour
- 3 large eggs
- 2 cups Italian-style breadcrumbs (or panko for extra crunch)
- 1 cup freshly grated Parmesan cheese
- 2 teaspoons garlic powder
- 2 teaspoons dried Italian seasoning
- 1 teaspoon salt
- ½ teaspoon black pepper
- ½ teaspoon paprika
- Vegetable oil or canola oil for frying (about 1 cup)
- Fresh lemon wedges for serving
- Fresh parsley, chopped (for garnish)
Optional Add-ins:
- ¼ teaspoon cayenne pepper (for heat)
- 1 teaspoon onion powder
- 2 tablespoons fresh herbs (basil, oregano)
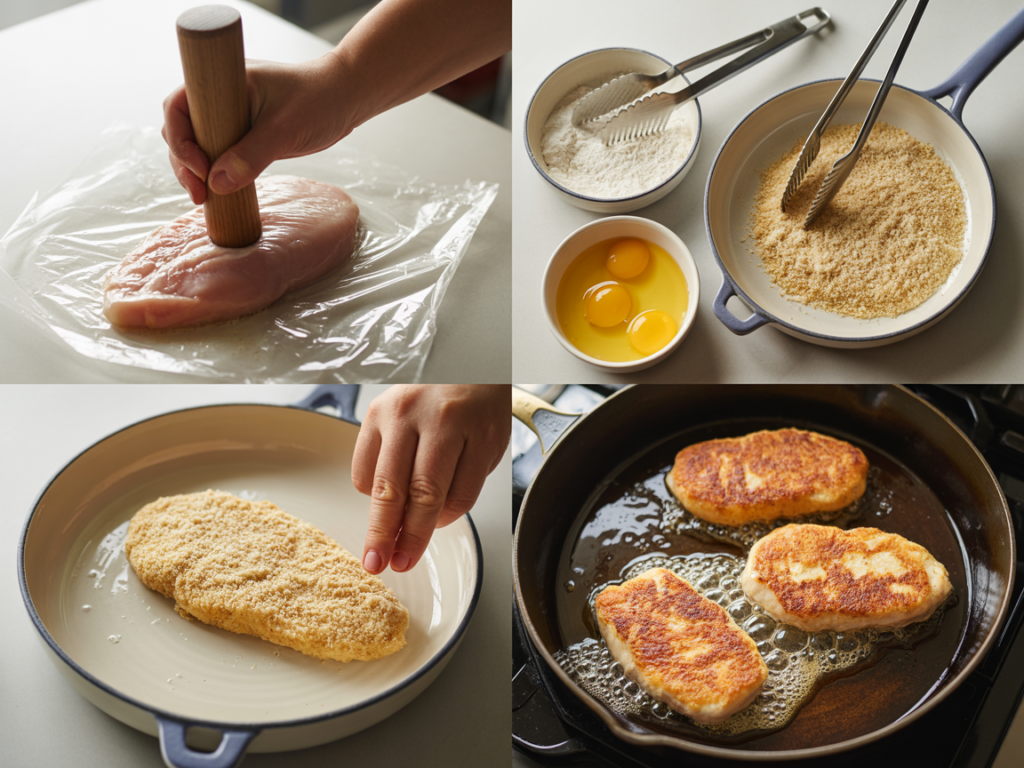
This comprehensive step-by-step collage demystifies the entire chicken cutlet preparation process, making it accessible for cooks of all skill levels. Each panel captures a crucial moment in the recipe, from the initial tenderizing to the satisfying sizzle of frying. The clear, well-lit photographs allow readers to see exactly what each stage should look like, building their confidence and ensuring success. Notice how the breading progresses from light flour coating to the final crispy golden crust – this visual guide is worth a thousand words.
Instructions
Step 1: Prepare the Chicken
- Place chicken breasts between two sheets of plastic wrap or parchment paper.
- Using a meat mallet or rolling pin, gently pound each breast to an even ½-inch thickness. Start from the center and work outward.
- Pat dry with paper towels and season lightly with salt and pepper.
- Let rest for 5-10 minutes at room temperature.
Step 2: Set Up Your Breading Station
- Prepare three shallow dishes:
- Dish 1: Add flour with ½ teaspoon salt and ¼ teaspoon pepper
- Dish 2: Beat eggs with 2 tablespoons water until smooth
- Dish 3: Combine breadcrumbs, Parmesan cheese, garlic powder, Italian seasoning, paprika, and remaining seasonings. Mix thoroughly.
Step 3: Bread the Chicken
- Working with one cutlet at a time:
- Dredge in flour, shaking off excess.
- Dip in egg mixture, letting excess drip off.
- Press firmly into breadcrumb mixture, coating both sides completely.
- Place on a clean plate. Repeat with remaining cutlets.
- For extra crunch, you can double-bread by repeating the egg and breadcrumb steps.
Step 4: Heat the Oil
- In a large skillet (preferably cast iron or heavy-bottomed), pour oil to about ¼-inch depth.
- Heat over medium-high heat until it reaches 350-375°F.
- Test by dropping a breadcrumb in – it should sizzle immediately but not burn. This temperature is crucial for crispy chicken fillet recipes.
Step 5: Fry the Cutlets
- Carefully place 1-2 cutlets in hot oil (don’t overcrowd).
- Cook for 3-4 minutes on the first side without moving them – this creates the golden crust.
- Flip once and cook another 3-4 minutes until golden brown and internal temperature reaches 165°F. The cutlets should be crispy and no longer pink inside.
Step 6: Drain and Rest
- Transfer cooked cutlets to a wire rack set over a baking sheet or paper towel-lined plate. This allows air circulation and prevents sogginess.
- Let rest for 2-3 minutes before serving. If cooking in batches, keep finished cutlets warm in a 200°F oven.
Step 7: Serve
- Garnish with fresh parsley and serve immediately with lemon wedges. The lemon brightens the flavors beautifully and cuts through the richness.

This stunning final presentation captures the golden, crispy perfection you’ll achieve with this recipe. The cutlets gleam with their beautiful bronze crust, while the cut piece reveals the tender, juicy interior that makes this dish so irresistible. Fresh parsley and bright lemon wedges add color and freshness to the composition. The professional styling and lighting make this dish look absolutely restaurant-worthy, proving that home-cooked meals can be just as impressive and delicious as anything you’d order out.
👉 If you love crispy and comforting chicken dinners, check out these recipes as well:
- Chicken Scallopini – Lemony Italian Classic
- Parmesan Crusted Chicken Sheet Pan Dinner
- Grilled Chicken Skewers with Summer Salad Mix
Tips and Tricks for Perfect Results
Oil Temperature is Everything
Invest in an instant-read thermometer or use the breadcrumb test. Too cool, and your breading absorbs oil becoming greasy; too hot, and the outside burns before the inside cooks. Maintain consistent medium-high heat and adjust as needed between batches.
The Best Breadcrumbs
Italian-style breadcrumbs add flavor, but panko creates superior crunch. My favorite combination? 1 cup panko mixed with 1 cup Italian breadcrumbs. For chicken cutlet recipes that truly shine, freshly grated Parmesan in the breading is non-negotiable – it adds nutty, salty flavor and helps the crust crisp up beautifully.
Pounding Technique
Place chicken in a freezer for 15 minutes before pounding – slightly firm chicken is easier to flatten evenly. Use gentle, even strokes rather than aggressive pounding. Think of it as tenderizing and flattening, not destroying. If you don’t have a meat mallet, a heavy skillet or rolling pin works perfectly.
Make-Ahead Magic
Bread your cutlets up to 4 hours ahead and refrigerate on a wire rack. This actually helps the breading adhere better. You can also freeze breaded (uncooked) cutlets for up to 3 months – fry directly from frozen, adding 2-3 minutes to cooking time.
Keeping Multiple Batches Warm
Place a wire rack on a baking sheet in a 200°F oven. As you finish each batch, transfer cutlets there. They’ll stay crispy and warm without getting soggy – perfect for feeding a crowd.
Delicious Variations
Spicy Italian Chicken Cutlets
Add 1 teaspoon red pepper flakes to the breadcrumb mixture and serve with spicy arrabbiata sauce. This transforms your basic recipe into something with real kick – perfect for those who like heat with their crispy chicken recipes.
Herb-Crusted Chicken
Replace dried Italian seasoning with 3 tablespoons fresh herbs: basil, parsley, and oregano. Add 2 tablespoons fresh lemon zest to the breadcrumbs. These buttered chicken recipes variations are spectacular in summer when fresh herbs are abundant.
Parmesan-Crusted Chicken
Double the Parmesan to 2 cups and reduce breadcrumbs to 1 cup. Add ½ cup finely ground almonds for a nutty, low-carb twist. This creates an ultra-crispy, cheese-forward coating that’s absolutely addictive.
Chicken Cutlet Sandwich
The ultimate chicken cutlet sandwich uses these cutlets, fresh mozzarella, roasted red peppers, arugula, and garlic aioli on a crusty ciabatta roll. Toast the bread, layer generously, and press lightly. It’s Italian deli perfection.
Lighter Oven-Baked Version
Place breaded cutlets on a greased wire rack over a baking sheet. Spray lightly with cooking oil. Bake at 425°F for 20-25 minutes, flipping halfway. While not quite as crispy as fried, this method is healthier and hands-off – great for chicken cutlet dinner ideas when you’re multitasking.
Gluten-Free Option
Substitute gluten-free flour and gluten-free breadcrumbs (or crushed rice cereal). The technique remains identical, and the results are just as delicious for those with dietary restrictions.
What to Serve With Chicken Cutlets
These versatile cutlets pair beautifully with countless sides:
Classic Italian Accompaniments
Serve alongside spaghetti aglio e olio, a simple arugula salad with lemon vinaigrette, or creamy risotto. For authentic Italian chicken cutlets experience, add a side of sautéed broccoli rabe with garlic and a wedge of lemon.
Comfort Food Pairings
Mashed potatoes, roasted vegetables, or a fresh caprese salad complement the crispy cutlets perfectly. Mac and cheese turns this into an indulgent meal kids will devour.
Lighter Options
Top a mixed green salad with sliced cutlets, cherry tomatoes, cucumber, and balsamic vinaigrette. Or serve over cauliflower rice with roasted asparagus for a low-carb dinner that doesn’t sacrifice flavor.
Turn It Into a Meal
Layer cutlets with marinara sauce and mozzarella, then broil until bubbly for chicken Parmesan. Slice and stuff into pita pockets with tzatziki and vegetables for a Mediterranean twist. The possibilities are truly endless.
Storage and Reheating
Refrigeration
Store cooked cutlets in an airtight container in the refrigerator for up to 3 days. Place parchment paper between layers to prevent sticking.
Reheating for Crispiness
The microwave will make them soggy. Instead, reheat in a 375°F oven on a wire rack for 8-10 minutes, or use an air fryer at 350°F for 4-5 minutes. Both methods restore the crispy exterior beautifully.
Freezing
Freeze cooked cutlets for up to 2 months. Thaw in the refrigerator overnight before reheating. For best results, slightly undercook if you plan to freeze, as reheating will finish the cooking process.
Conclusion
Making perfect chicken cutlets is truly within everyone’s reach – it just takes a little patience, the right technique, and a willingness to learn. This recipe for chicken cutlet has been my go-to for years because it’s reliable, delicious, and infinitely adaptable. Whether you’re cooking for picky kids, impressing dinner guests, or simply treating yourself to a satisfying homemade meal, these italian chicken cutlets deliver every single time.
Remember, cooking is a journey of joy and discovery. Don’t be intimidated by the process – embrace it! Every time you cook, you’re building skills and creating memories. These chicken fillet recipes are meant to empower you in the kitchen, not stress you out. So grab your meat mallet, set up that breading station, and get ready to create something absolutely delicious. Your kitchen, your rules, your perfect crispy chicken cutlets.
I’d love to hear how your cutlets turn out! Share your photos, your variations, and your own tips. Together, we’re building a community of home cooks who believe that great food should be accessible, joyful, and always delicious.
FAQ SECTION
Q1: Can I use a different type of breadcrumb or coating?
Absolutely! While traditional Italian breadcrumbs work beautifully, there are many delicious alternatives for your chicken cutlet recipe. Panko breadcrumbs create an even crispier, lighter texture because of their larger flake size – I often mix half panko with half Italian breadcrumbs for the best of both worlds. For a gluten-free version, crushed rice cereal, almond flour mixed with grated Parmesan, or gluten-free breadcrumbs all work wonderfully with the same technique. You can even get creative with crushed cornflakes for extra crunch, or use seasoned coating mixes if you’re short on time. The key is ensuring whatever coating you choose is dry and adheres well to the egg wash. Don’t be afraid to experiment – some of the best chicken cutlet recipes come from trying something new!
Q2: How do I prevent my breading from falling off during cooking?
This is one of the most common frustrations, but it’s easily solved with proper technique! First, make sure your chicken is thoroughly patted dry before starting – moisture is the enemy of adhesion. Let your breaded cutlets rest in the refrigerator for 15-30 minutes before frying; this allows the breading to “set” and bond with the chicken much better. When cooking, resist the urge to move or flip the cutlets multiple times – place them in the hot oil and leave them alone for 3-4 minutes before flipping once. The crust needs time to develop and will release naturally from the pan when it’s ready. Also ensure your oil is at the correct temperature (350-375°F); if it’s too cool, the breading absorbs oil and becomes soggy, while too-hot oil can cause the coating to separate. Finally, don’t skip the three-stage breading process (flour, egg, breadcrumbs) – each layer serves a purpose in creating that perfectly adhered, crispy crust that makes italian chicken cutlets so irresistible.
Q3: Can I make chicken cutlets ahead of time, and how should I store and reheat them?
Yes! Chicken cutlets are excellent for meal prep and can be prepared in advance in multiple ways. For the best results, you can bread the raw cutlets up to 4 hours ahead and store them uncovered on a wire rack in the refrigerator – this actually helps the breading set and stick better. If you want to prep even further ahead, bread the cutlets and freeze them uncooked for up to 3 months; cook directly from frozen, adding just 2-3 extra minutes to the cooking time. Cooked cutlets can be refrigerated in an airtight container for up to 3 days or frozen for up to 2 months. The secret to reheating is avoiding the microwave, which makes them soggy and sad. Instead, place cutlets on a wire rack over a baking sheet and reheat in a 375°F oven for 8-10 minutes until heated through and crispy again. An air fryer works brilliantly too – just 4-5 minutes at 350°F and they taste freshly made! These make-ahead friendly chicken cutlet dinner ideas are perfect for busy weeknights or batch cooking, and with proper reheating technique, they’ll taste just as delicious as when first prepared.


Chicken Cutlet recipes
Ingredients
Instructions
- Step 1: Prepare the Chicken
Place chicken breasts between two sheets of plastic wrap or parchment paper.
Using a meat mallet or rolling pin, gently pound each breast to an even ½-inch thickness. Start from the center and work outward.
Pat dry with paper towels and season lightly with salt and pepper.
Let rest for 5-10 minutes at room temperature.
Step 2: Set Up Your Breading Station
Prepare three shallow dishes:
Dish 1: Add flour with ½ teaspoon salt and ¼ teaspoon pepper
Dish 2: Beat eggs with 2 tablespoons water until smooth
Dish 3: Combine breadcrumbs, Parmesan cheese, garlic powder, Italian seasoning, paprika, and remaining seasonings. Mix thoroughly.
Step 3: Bread the Chicken
Working with one cutlet at a time:
Dredge in flour, shaking off excess.
Dip in egg mixture, letting excess drip off.
Press firmly into breadcrumb mixture, coating both sides completely.
Place on a clean plate. Repeat with remaining cutlets.
For extra crunch, you can double-bread by repeating the egg and breadcrumb steps.
Step 4: Heat the Oil
In a large skillet (preferably cast iron or heavy-bottomed), pour oil to about ¼-inch depth.
Heat over medium-high heat until it reaches 350-375°F.
Test by dropping a breadcrumb in – it should sizzle immediately but not burn. This temperature is crucial for crispy chicken fillet recipes.
Step 5: Fry the Cutlets
Carefully place 1-2 cutlets in hot oil (don’t overcrowd).
Cook for 3-4 minutes on the first side without moving them – this creates the golden crust.
Flip once and cook another 3-4 minutes until golden brown and internal temperature reaches 165°F. The cutlets should be crispy and no longer pink inside.
Step 6: Drain and Rest
Transfer cooked cutlets to a wire rack set over a baking sheet or paper towel-lined plate. This allows air circulation and prevents sogginess.
Let rest for 2-3 minutes before serving. If cooking in batches, keep finished cutlets warm in a 200°F oven.
Step 7: Serve
Garnish with fresh parsley and serve immediately with lemon wedges. The lemon brightens the flavors beautifully and cuts through the richness.